


Print at 100%
Any home printer will do. Print the template at 100% on matte paper around 200 gsm, which holds a joint best. Turn off "Fit to page" - it silently shrinks her.
 Instant download
 5/5 from 168 reviews
 Letter + A4 included
A sheet of paper, nail scissors and a thread with a knot. That is how vintage paper dolls were put together a hundred years ago, and it still works. The full guide lives here rather than in a PDF - so it can be corrected, extended and improved forever.
About 30 minutes
 Every joint moves
 No workshop needed


Check off each step as you go - the page remembers where you stopped

Before you cut anything: check the scale
Open the print window and check the scale: it must say Actual size or 100%. Fit to page shrinks the sheet, and the doll comes out smaller than 17 cm. Print the PDF made for your paper, Letter or A4, so nothing has to be resized.
Any home printer will do. Print the template at 100% on matte paper around 200 gsm, which holds a joint best. Turn off "Fit to page" - it silently shrinks her.

Nail scissors are enough. For the gaps inside a piece - between fingers - pierce first, then cut outwards from the hole.

Every joint has a small dot that marks the hole. Pierce the center of the dot, resting the piece on an eraser or a cork so the paper does not tear.

Push the brad through both pieces and open the legs - loosely. She has to swing. A thread with a slack knot does exactly the same job.

A brad tightened all the way down. The joint locks and the doll stops moving. Leave it loose enough that the piece turns under its own weight.

A small dot on every joint shows where the hole goes. Pierce right through its center.

Matte, around 200 gsm. Thinner paper works if you glue it onto card from a cereal box - the joint needs body, not thickness.
Nothing here is a requirement. Tell the page what you are missing and it will show you what to use instead.
76 answers
 Fastening
Thread with a knot. Pass it through both holes and tie it loosely on each side so the piece still turns. That is how it was done a hundred years ago.
 Fastening
Two small buttons and thread - one button each side, sewn to each other, very vintage. Also: an unbent paper clip, the wire tie from a bread bag, an eyelet, or elastic thread, which makes the limbs springy.
 Holes
Holes
Pierce the top piece first, lay it exactly where it belongs, and push the needle through it to mark the piece underneath. Never measure - always mark through.
 Strength
Glue a coin, a washer or a strip of thick card behind the feet. Weight low down is worth more than any stand.
 Fastening
Glue the joint flat and hide the seam under a button or a sticker.
 Fastening
Do not tighten the fastener all the way. Slip in a washer - a bead, a paper circle, a ring cut from a drinking straw. Then rub the joint with a pencil: graphite works as a lubricant.
Printing
A copy shop. It is one page - ask for 200 gsm matte, printed at 100%.
 Fastening
Stick a stationery reinforcement ring, or a small piece of tape on the back - before you pierce, not after.
 Fastening
Put the head on the back and open the legs towards the front, where the next piece hides them. If it has to stay in front, cap it with a circle from a hole punch or color it with a marker.
 Fastening
Add a paper washer for friction, or swap the thread for elastic - the limb then springs back where you put it. A little graphite evens out the resistance so it holds without locking.
Printing
Look at the print window before you print: the scale must say Actual size or 100%. Fit to page shrinks her, and she comes out smaller than 17 cm.
Printing
Give it ten minutes and hold the sheet by the margins. Inkjet on matte paper feels dry long before it actually is.
 Display
A paper clip bent into a stand. A clothes peg. A piece of Blu-tack.
 Holes
Holes
Push a needle into an eraser or a wine cork and you have a handle. A push pin, a toothpick, the point of a compass or a spent ballpoint refill all work.
 Holes
Holes
An eraser, a cork, cardboard folded in four, or a scrap of foam. Anything that lets the point through without blunting it.
Display
A magnet on the back, and onto the fridge she goes.
 Holes
Holes
A brad only needs a short slit. A round hole is optional.
 Holes
Holes
Glue a small patch of paper on the back, let it dry, and pierce again through both layers. On a visible spot use a scrap of the same printed sheet.

 Cutting
Pierce it with a needle, slide the tip of nail scissors into the hole and cut outwards. Or fold the piece gently at that spot and snip along the fold.
Display
Brad legs are sharp, so give them thread and buttons instead, and let an adult pierce the holes with a blunt tapestry needle. Coloring a black and white print is the part they remember.
Fastening
Curl them twice instead of once - the second turn tucks the tip under and stops it scratching. Or shorten them with nail clippers before you fold.
 Cutting
Nail scissors or embroidery scissors. On tight curves, nail clippers are unexpectedly good.
 Cutting
Thick cardboard, an old magazine, a chopping board. Not glass - it kills the blade in minutes.
Printing
Whichever matches the paper in your tray. The layouts differ, the doll does not: she is 17 cm in both.
Printing
Transparent background, no cut lines - made for laser cutters and cutting machines that find the outline on their own. The machine traces the edge of every part and cuts it for you. The same file prints her larger than a page.
Fastening
Tie a double knot and add a small drop of white glue to the knot itself. Keep the glue off the paper, or the joint will stick, and let it dry completely before she moves again.
 Cutting
The blade is blunt. Change it far more often than feels reasonable - that is half of a clean cut.
 Cutting
Inner shapes first, the outer silhouette last. While the piece is still attached to the sheet it stays flat and stiff, and the fiddly parts become far easier.
 Cutting
Keep the blade still and turn the paper instead, supporting the piece flat with your other hand. Short strokes, never one long sweep.
Fastening
This doll is not a toy for children under three. Keep brads, beads, buttons, coins and magnets out of their reach, because children that young can swallow parts this small or choke on them. Count the parts out before you start and count them again when you clean up.
Holes
An office punch makes a hole about 6 mm (1/4 inch) wide, wider than the 4.5 mm head of a brad, so the brad falls straight through. Pierce the small dot that marks the hole with a needle or an awl instead, or use a craft punch of 2 mm or less.
 Paper
Paper
Print on ordinary paper and glue it onto card: a cereal box, a shoe box, the back of a notepad. Or glue two printed sheets together.
 Paper
Paper
A manila folder, an old postcard, a playing card for the smaller pieces.
Cutting
Cut the sheet into rough blocks first, one part per block with a generous margin, and keep each part's circled number inside its block: a slip at this stage only costs you margin. Then trim each part exactly, because a small block turns easily in your hand.
 Paper
Paper
Matte paper plus the "photo / heavy paper" setting in the print dialog. Glossy looks brighter for an hour and then keeps every fingerprint you leave on it.
 Paper
Paper
Spread the glue thin and right to the edges, then press the sheet under a stack of books until it is properly dry. A glue stick warps less than PVA.
 Strength
Wide clear tape on both sides is the simplest. Self-adhesive book covering film also works. Or press a laminating pouch with an iron through baking paper - a hair straightener does it too.
Cutting
Give the child the larger pieces with long, gentle outlines, and let them cut with their own round-tipped children's scissors. Keep small details, tight curves and sharp corners for an adult.
Cutting
Put a lamp about 15 inches (40 cm) from your work, on the side opposite your cutting hand, so the shadow of your hand falls away from the line. Eyes need more light with age, and fine cutting is where you notice it first.
Paper
Read the word after the number: 110 lb index is about 200 gsm, 65 lb cover about 176 gsm and 80 lb cover about 216 gsm, and all three work. Text weight is a different scale, so 80 lb text is only about 118 gsm and far too thin on its own.
 Strength
Matte acrylic spray varnish, or PVA glue thinned with water. The paper stays paper, it just stops fearing hands.
 Strength
Leave about 2 mm of film around the piece instead of cutting flush - that sealed border is what holds. Trim the corners at a slight angle so nothing catches.
Paper
Print on the whiter, smoother side, which carries the coating that holds the ink. The back is often slightly off-white, and a print on it comes out blotchy. If both sides look alike, check the pack: it usually marks the printable side.
 Printing
Print in gray and color her in yourself. With children this quietly turns into the main event of the evening.
 Printing
Same tray, same paper, same setting - and print the whole family in one go. Printers drift between sessions, so a doll printed tonight and an arm reprinted next week rarely share a shade.
Strength
Give a fresh inkjet print at least a full day before it goes under film or glass, and longer where large areas are heavily inked. The ink keeps giving off solvents after it feels dry, and sealed in too early they can fog the glass or raise small bubbles under the film.
Printing
In the PDF reader's own print window, choose "Actual size", because "Fit" and "Shrink oversized pages" both make her smaller. Then open the printer's Properties or Preferences, set its scaling to 100% and switch off borderless printing, which enlarges the page by a few percent. If you print straight from a web browser, open the PDF in a PDF reader instead, because browsers can scale the page on their own.

 Finishing
Color the edge with a marker or pencil to match the piece. Of all the small things, this one changes the result the most.
 Finishing
Go over it with a nail file.
 Finishing
Wipe the edges with a used tea bag, or dab brown ink on a sponge and touch only the outline. Stop earlier than you think - it reads as age only while it stays uneven.
Printing
Feed one sheet at a time through the rear or manual feed slot, where the paper bends far less than in the main tray, and choose the heavy or thick paper setting in the print dialog. Set the paper guides snug but not tight, and look up your model's maximum paper weight, which is often higher for that slot. Not every printer has such a slot, and without one it is easier to print on ordinary paper and glue it onto card.
Printing
Run the print head alignment from your printer's maintenance menu. If the lines still do not meet, switch off bidirectional or high-speed printing in the driver: it is slower, but the head then prints in one direction only and the lines match up again.
Printing
Print a nozzle check from your printer's maintenance menu: gaps in the printed pattern mean that some nozzles are clogged. Check the ink levels, then clean the print head and print the check again. If gaps remain after a few cleanings, switch the printer off and try again the next day: the clog softens overnight, and every cleaning uses ink.
 Finishing
A light coat of matte varnish, or simply dry clean hands and holding her by the edges. Matte paper forgives; glossy never does.
 Display
Glue a drinking straw or a wooden skewer to her back.
Printing
Save both PDFs and the PNG in a folder you will find again, and keep a second copy on a USB flash drive or in cloud storage. A lost or torn piece can then be printed again at any time. A single reprinted part can come out a shade different, so for a perfect match print the whole sheet and rebuild her.
Finishing
Color her before cutting, while the sheet is still whole. It lies flat and stays put, and thin parts never bend in your hand. Your strokes can run past the outline onto paper you will cut away, but keep clear of the circled numbers and the hole dots.
 Display
An envelope or a zip bag with the doll name written on it. Cut pieces are easy to lose and impossible to tell apart once four dolls share a table.
 Fastening
Stack them thinnest first and slip a paper washer between the two that must move independently. Otherwise the middle piece drags both of its neighbors with it.
 Holes
Holes
After. The film then seals the rim of the hole and that is exactly where paper usually gives up first.
Finishing
Use spray varnish outdoors or by a wide-open window, with no open flame nearby, and keep children and pets away until the smell is gone. Hold the can about 12 inches (30 cm) from the pieces and give two light coats instead of one heavy coat. Between coats, wait as long as the label on the can says.
 Cutting
One continuous motion, turning the paper steadily into the blade while your cutting hand stays still. Stopping mid-curve is what leaves the flat spot.
 Cutting
Cut in two or three sittings - it is not a race, and a tired hand shows in every edge. Scissors tire the hand far less than a knife held at an angle.
Display
Keep her out of direct sun: it fades printed ink, and faded color never comes back. Pick a shelf away from the window and not right across from it.
Display
Turn off the lights, hold her by a drinking straw taped to her back a little in front of a pale wall, and aim an LED flashlight, which stays cool, at her from the other side. Close to the wall her shadow stays small with sharp edges, and as she moves toward the flashlight it grows larger and fuzzier. Set the flashlight down on a steady surface and keep its beam away from faces.
Display
Fix the phone so it cannot move, then shift one arm or leg a few millimeters between photos. Played back at 8 to 12 photos a second, the pictures make her walk and wave. Light the scene with a lamp rather than daylight, so the brightness stays the same from frame to frame.
 Paper
Paper
Print the sheet twice, mirror the second one, and glue them back to back. Align them against a window before the glue grabs - daylight through the paper shows every millimeter of offset.
 Paper
Paper
Not for these. Canvas and linen finishes break the fine lines and swallow the eyes. Smooth matte keeps the print intact.
 Strength
Replace the fastener and add a punched paper washer on each side. The hole rarely fails first - the metal simply widens it.
Display
Whisk the dust off with a clean, dry, very soft brush, such as a makeup brush, in light strokes from her head toward her feet, but do not brush over pastel, which smears. Keep water, damp cloths, cleaning sprays and cleaners away from her, and stop as soon as the loose dust is gone.
 Strength
Store her flat between the pages of a heavy book. If she is meant to be played with rather than displayed, laminate her and the weather stops mattering.
 Finishing
Colored pencil and dry pastel sit on top beautifully. Markers and anything wet lift the ink - test on the sheet margin first.
Cutting
Every part has a small circled number printed next to it on the sheet: pencil that number lightly on the back of each piece as you cut it out. The outline picture of the assembled doll shows the same numbers, each one where its part goes.
 Finishing
Dab gloss varnish only where fabric or metal is shown and leave the face matte. That single contrast does more for realism than any amount of shading.
 Display
A shadow box or any frame deep enough that the glass never touches her. Pin her through the joints - never through the picture.
 Display
Thread from the top of the head, and balance two dolls on a stick until it hangs level. They turn with the room and the joints do the rest.
Write to us and we will add it to this page - that is the whole point of keeping the guide on the site.
Ingenuity beats equipment. Every doll on this site can be built with things you did not buy for it.

Loose on both sides and the joint still swings. Two buttons sewn to each other look even better.

Instant handle. A cork, a push pin or the point of a compass do the same.

Thin straight tips reach inside the small gaps. Nail clippers handle tight curves.

Print on plain paper, glue it to the card. The joint needs body, not thickness.

Both sides, smoothed from the center out. Book covering film is the tidier version.
What we keep on our own table. Buy it over years, not in one evening - the first two lines already change everything.
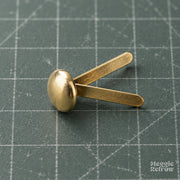
4.5 mm round head, 8 mm shank, one per joint

The one tool that pays for itself on the first doll

Plus spare blades - more of them than you think
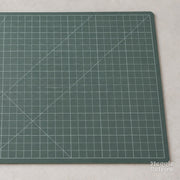
Self-healing, gridded, A3

Matte, 200 gsm, A4 or US Letter
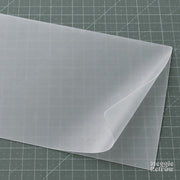
Matte, 125 micron, A4

Fine straight tips, for everything the knife cannot reach

Color, with a rear tray that takes heavy paper
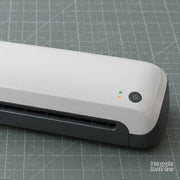
Pouch type, A4
Notes from our desk - assembly, printing and the history of paper dolls.
4 stories
A paper clip stand, a magnet, a piece of Blu-tack - she lives anywhere
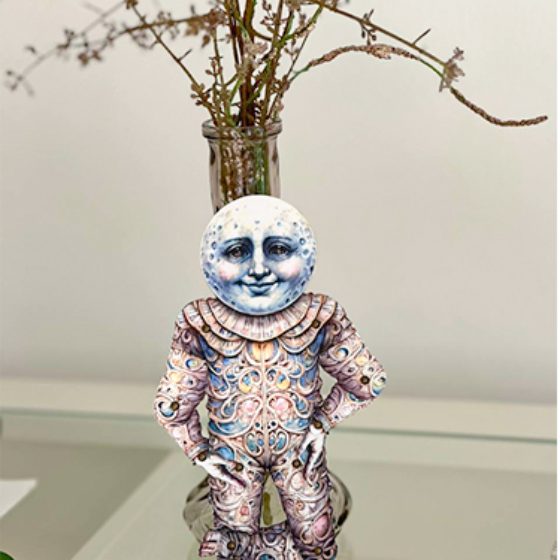
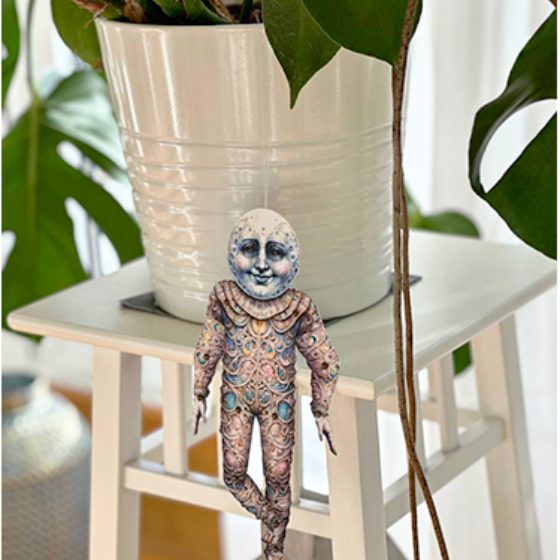
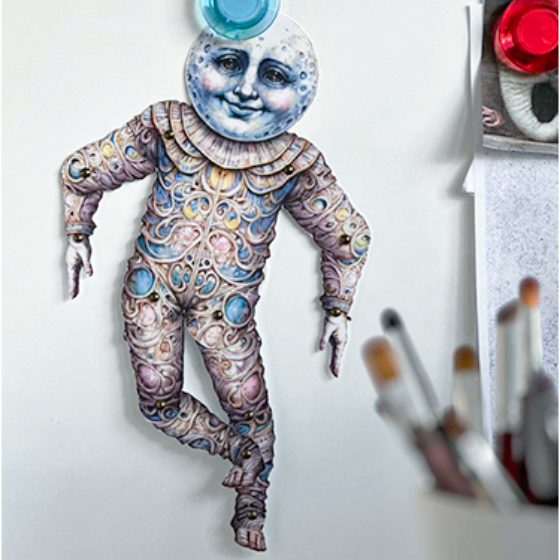
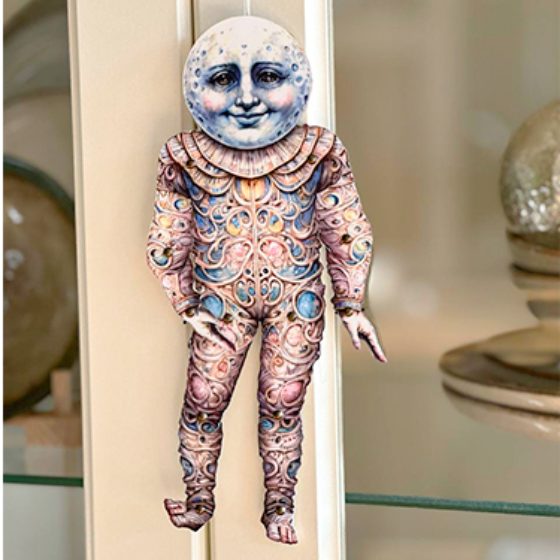
A home printer, paper and nail scissors. For the joints: a needle and brads, or a thread with a knot. No craft knife or cutting mat needed.
Matte paper around 200 gsm holds a joint best. Thinner paper works if you glue it onto card from a cereal box.
Always at 100%. “Fit to page” changes the height of the doll. Every doll comes as a US Letter PDF and an A4 PDF, so pick the one that matches your paper.
Tie a thread with a loose knot on both sides of the joint. Two buttons sewn to each other work as well.
The brad is too tight. Loosen it until the part turns under its own weight.
About thirty minutes, in four steps: print, cut out, pierce the marked holes, join.
So pretty and easy to put together!!
So much fun to put together. The quality is great!
I loved paper dolls when I was a child so to see someone selling these dolls made me very happy.
Moonsie is free. Print her tonight and try every hack on this page before you spend anything.